We purchased our Cougar 5th wheel as a 1 year old in 2019. The previous owner was quite tall at probably 6'2-3" and after a winter season in Arizona, he decided he needed a bigger rig. The 26RLS suits us just fine and in many respects is slightly larger and has some additional functionality over our sailboat.
Since we plan to just park it in one spot, we can't speak to it's "tow"-ability or how well it survives going down bumpy roads (sorry).
On this page I will have a few pics with short explanations of any modifications we have made for comfort or ease of use.
 |
| 2018 Keystone Cougar Xlite 26RLS |
One of the things I like about our layout is that I am facing the door while in the galley and have a good view out the door or window behind the sink. (No one can sneak up on me!) I love to cook and spent a fair bit of time doing food prep, either at the counter or at the dinette.
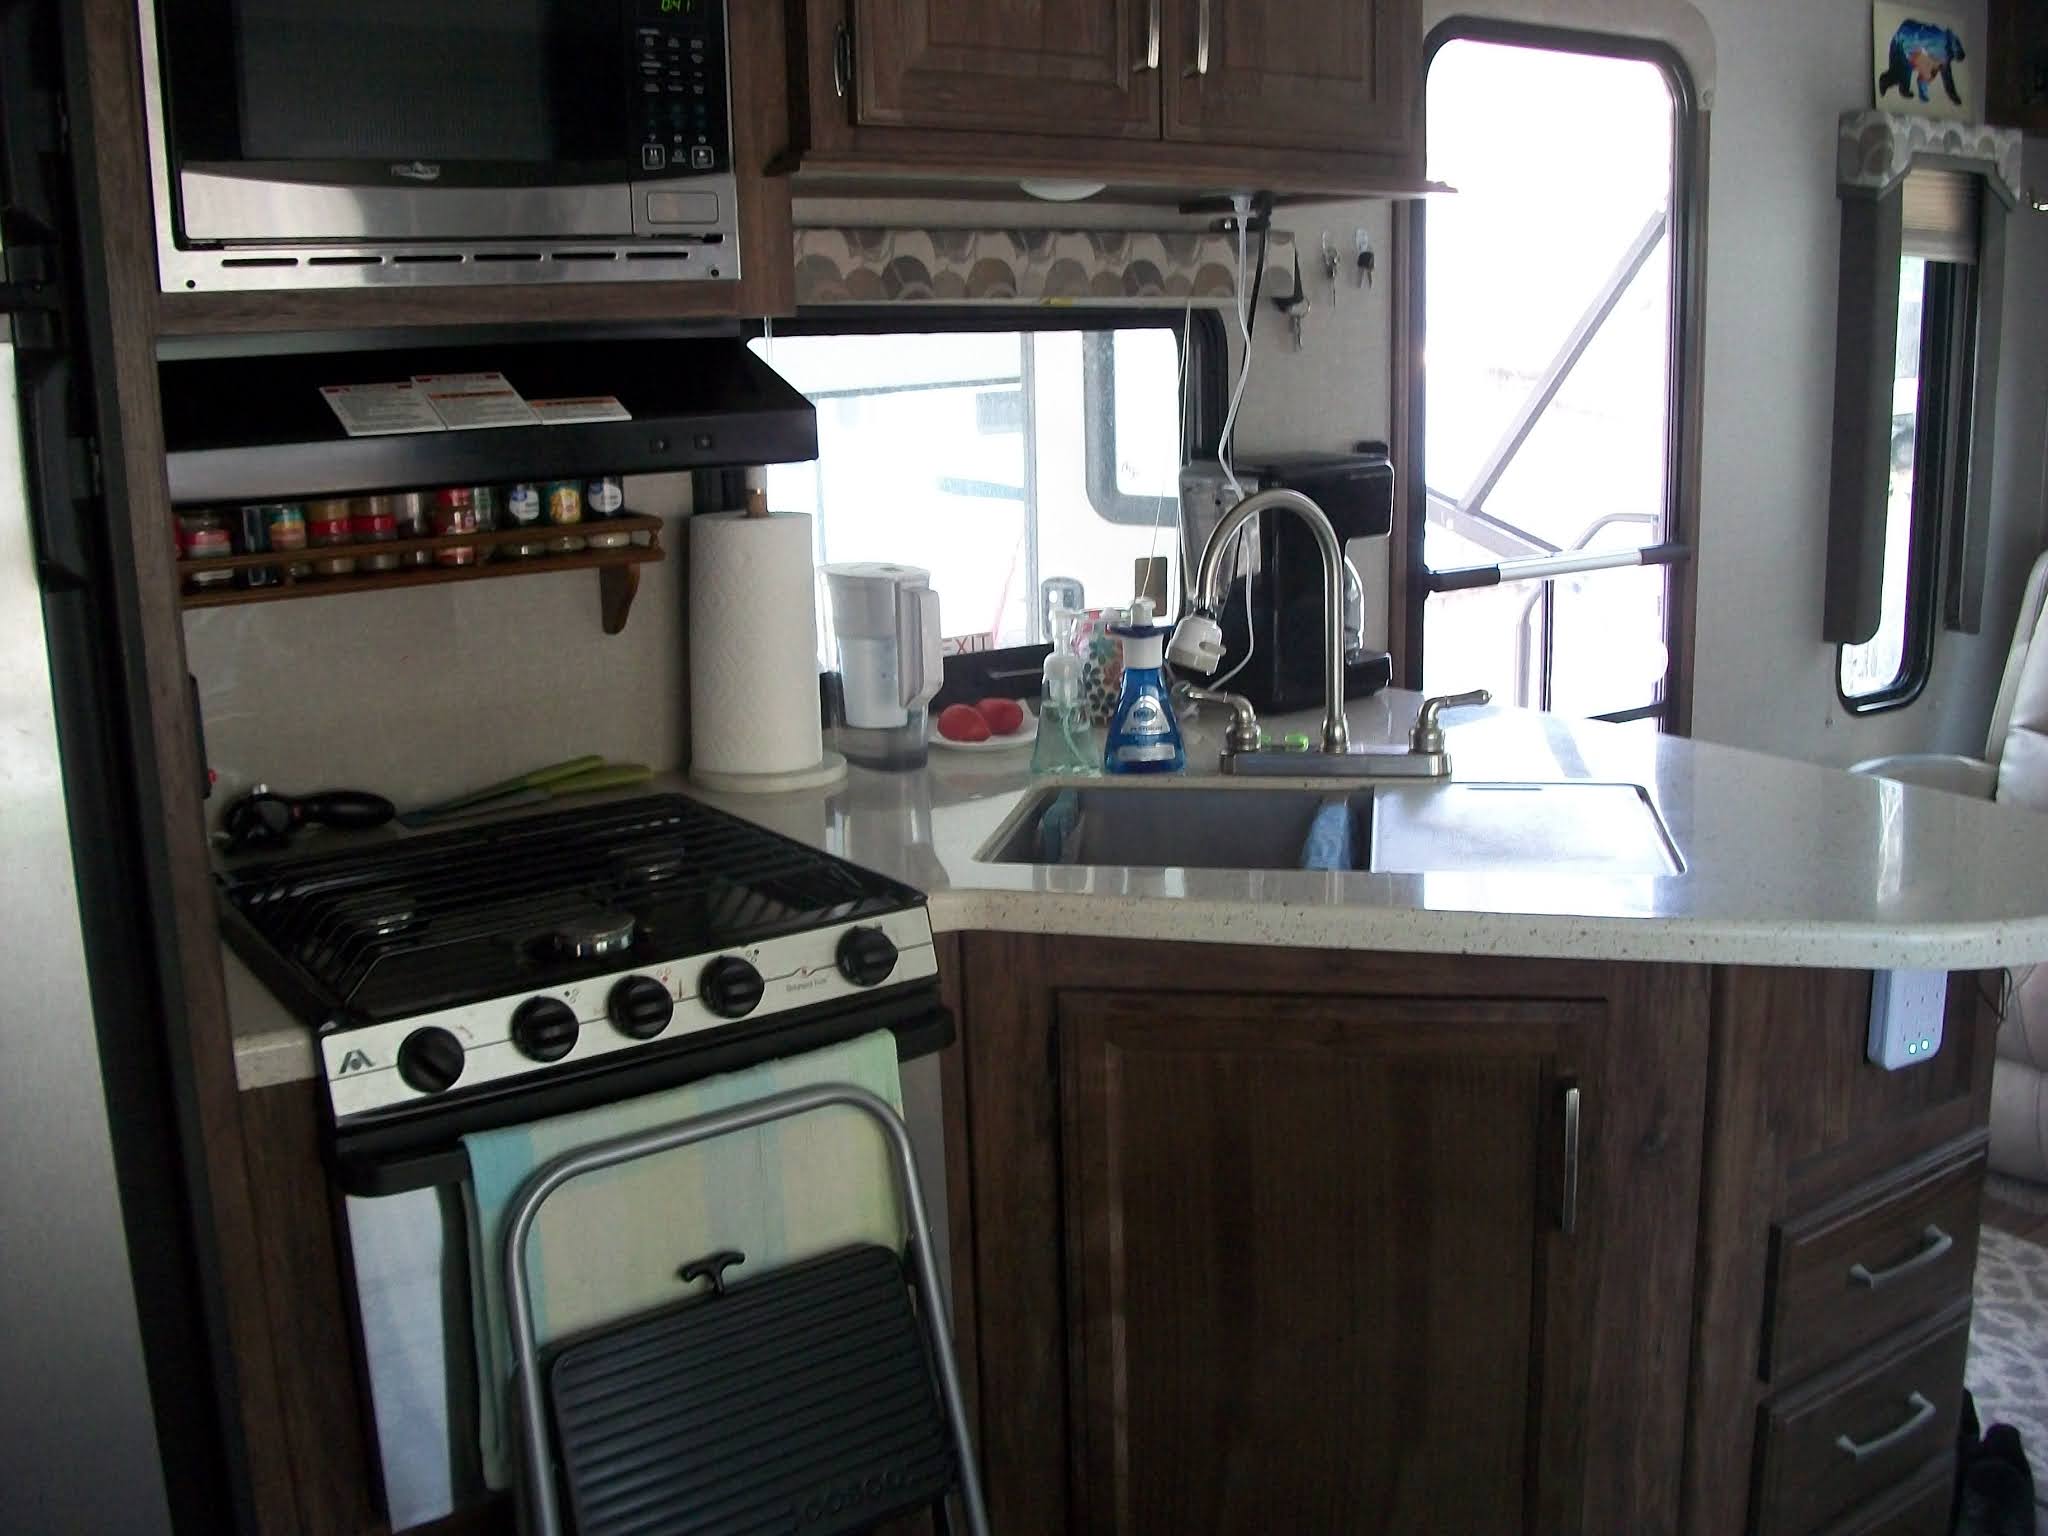
The under the sink storage cabinet is quite deep & large and besides the trash can stores kitchen garbage bags, cleaning supplies & refills, 12-pks of soda and a few other odds and ends.
We found a couple of pieces of pin-rail shelving while browsing at the local thrift store and used one behind the stove as a spice rack. Not ideal, as it gets warm back there, but so convenient for me when cooking.
Another thing you can see in the above shot is my 2-step stool, extremely useful for me @ 5'2". I need it for the galley cabinets for sure, as well as the high hung storage cabinets throughout the layout. It stores pretty nicely in front of the oven.
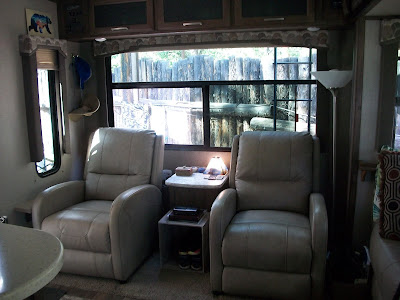
In the rear of the rig are the recliners. In between is the house fresh water pump box made into a table in between. We found a wooden box that we use to put our extra shoes in to keep them somewhat organized. It is stashed in front of the table and is used as a table itself. We also added a teeny shelf to the far left of the pic, next to the right hand armrest of the leftmost recliner. Just big enough for a book or a drink.

The dinette area utilizes a built-in bench on one side of the table and chairs on the other. I like this arrangement very much as it adds flexibility with seating at the dinette.

The shot above is a bit blurry but it's looking past the dinette on the left, and fridge on the right to the entertainment center with a nice flat screen tv, overhead storage and an electric fireplace. The tv has an HDMI plug and we also use a Google TV dongle so we can stream things from the laptop directly to the tv.


Another thing I consider a "major" upgrade that the manufacturer should have thought of is the use of springs to hold up the cabinet fronts for the high overhead cabinets. As it was, you had to hold the lid up while digging around for the item stored there. Ridiculous, especially for a short person, and so easy to resolve. We added 5 springs and fixed them all at one time.

I'll include one shot of the shower just to show how -BIG- it is. We added a shampoo & shower gel dispenser which isn't seen in this shot.


This shot is from the recliners by the door and shows the additional shelf we added under the counter above the 2 large drawers. We keep miscellaneous items here such as hand wipes, flashlight, bear spray, and a small basket for tiny items like chapstick, change, & doodads. Under the rounded end of the counter we added a multiplug with 2 additional USB charging ports and often set our phones on the shelf while charging. In total there are 2 built-in USB charging stations plus the 6 we've added (2 multiplugs; one with 2 USB ports, and one with 4 ports). We charge a lot of things, bluetooth headphones, 2 cell phones, bluetooth speakers and a miscellany of other small stuff.
Level with the valance (above the coffeemaker) you can see we've made plenty of use of the various "command" hangers, in this case, for keys.
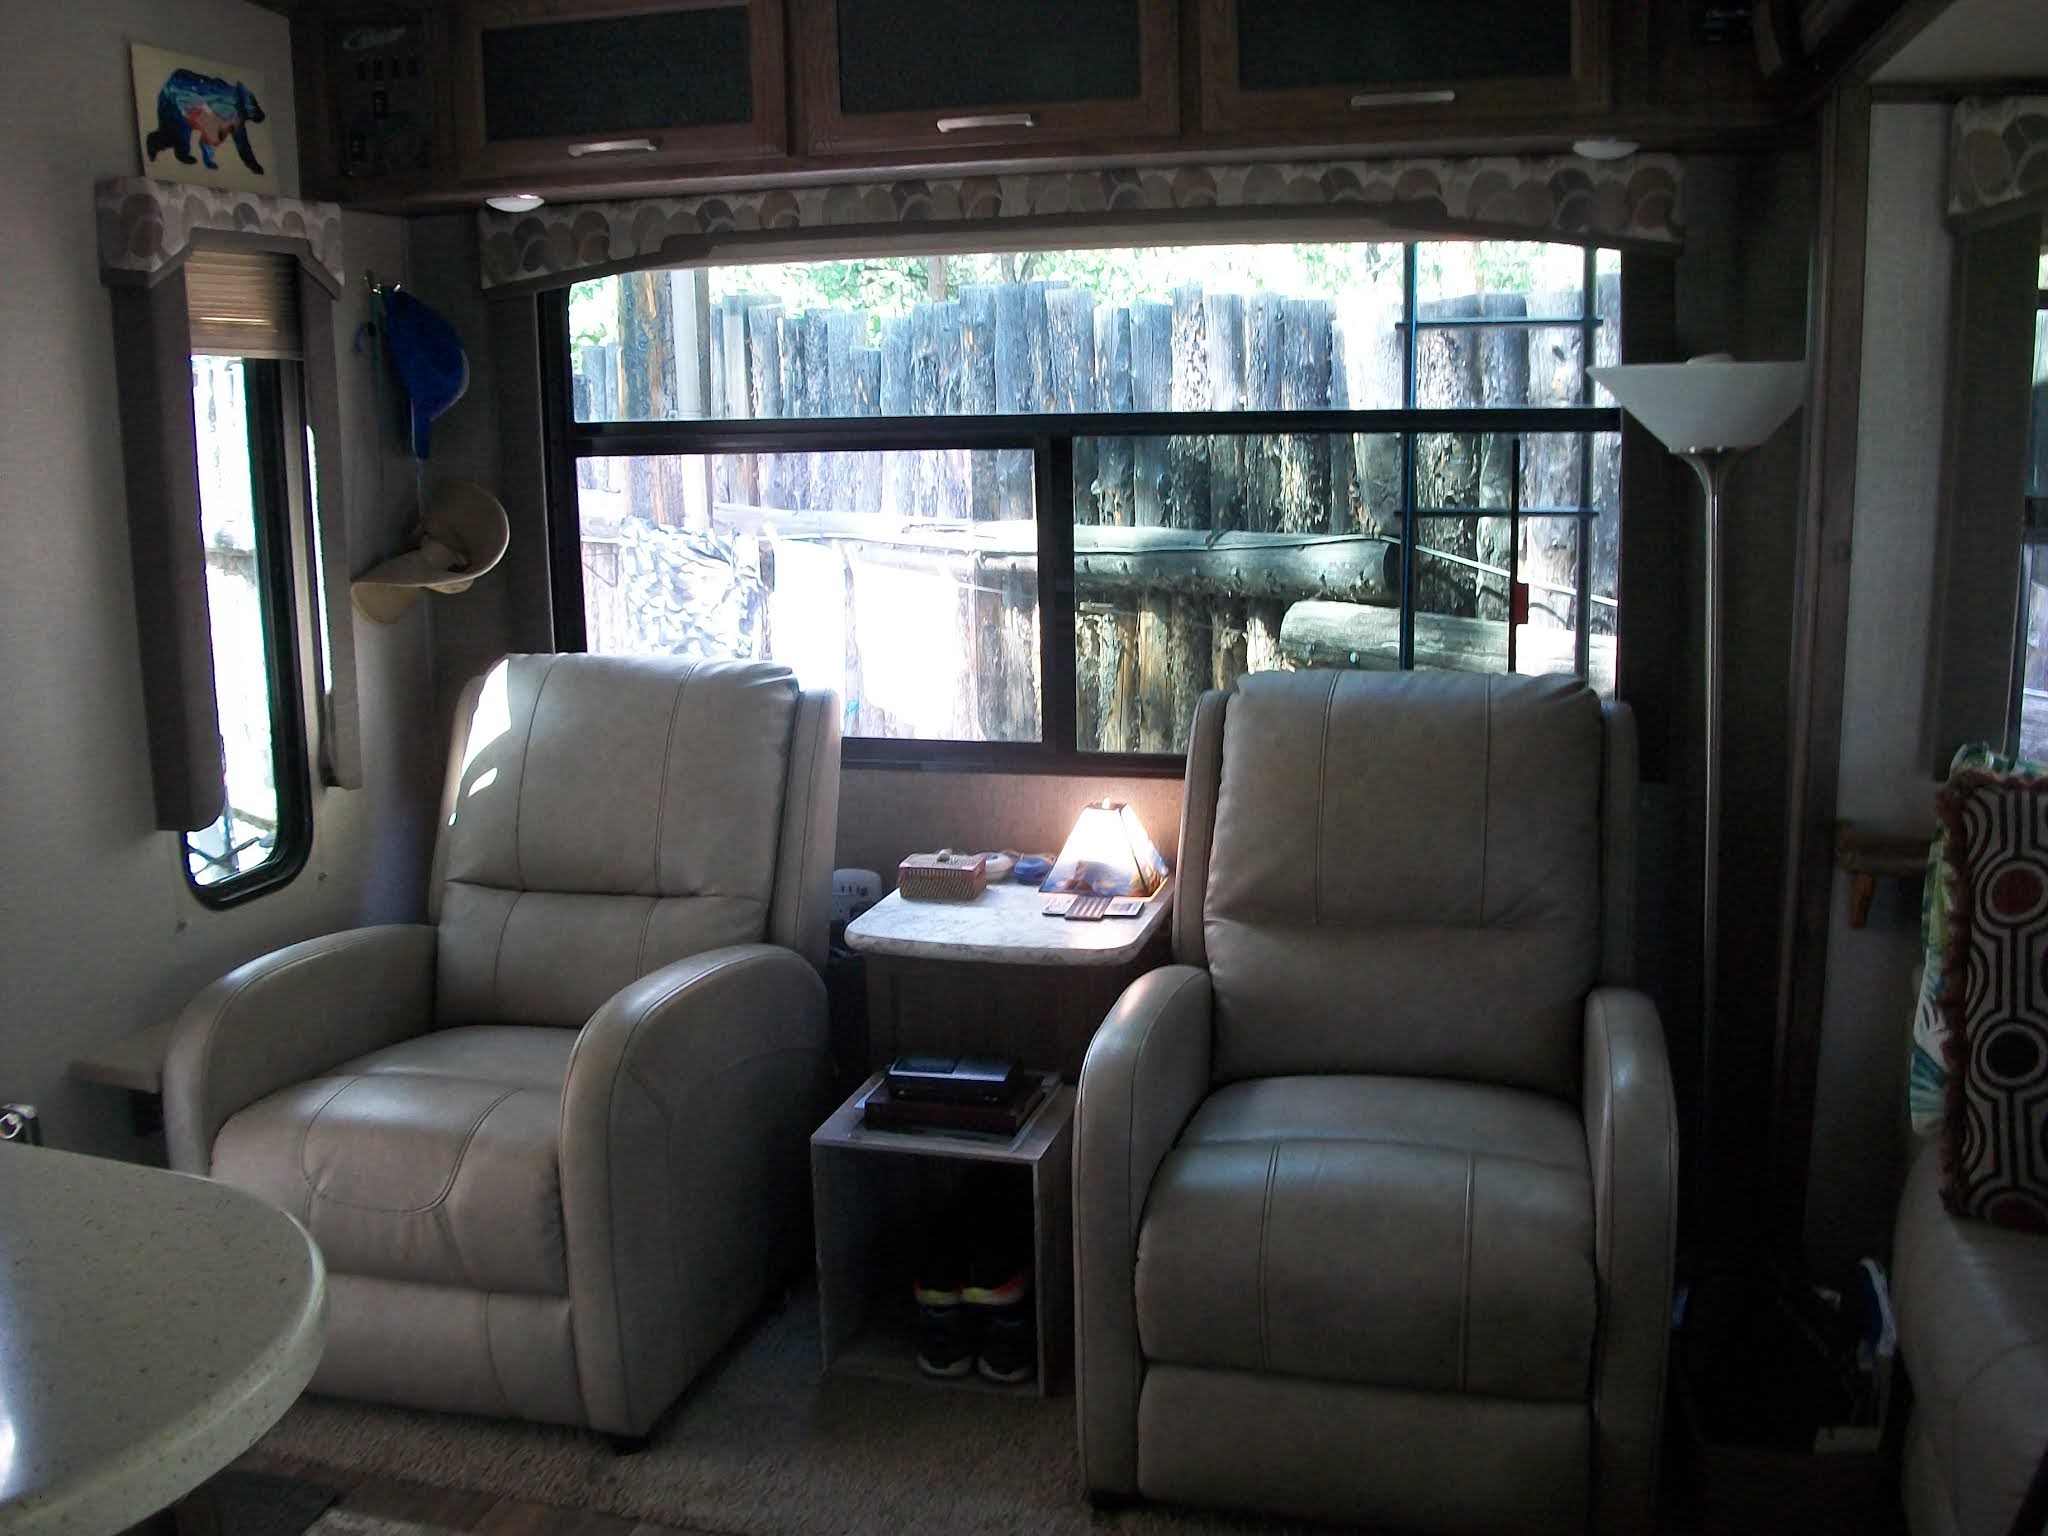
In the rear of the rig are the recliners. In between is the house fresh water pump box made into a table in between. We found a wooden box that we use to put our extra shoes in to keep them somewhat organized. It is stashed in front of the table and is used as a table itself. We also added a teeny shelf to the far left of the pic, next to the right hand armrest of the leftmost recliner. Just big enough for a book or a drink.
We opted to remove the hide-away loveseat, as we don't require overnight guest accommodations, and replaced it with another push-back recliner. We use it in conjunction with an adjustable tray table that slides under the furniture and allows for easy entry/exit to the recliner. In addition, we added a small bookcase for storage convenience.

The dinette area utilizes a built-in bench on one side of the table and chairs on the other. I like this arrangement very much as it adds flexibility with seating at the dinette.

The shot above is a bit blurry but it's looking past the dinette on the left, and fridge on the right to the entertainment center with a nice flat screen tv, overhead storage and an electric fireplace. The tv has an HDMI plug and we also use a Google TV dongle so we can stream things from the laptop directly to the tv.
Head up the 2 steps to the shower (left) and toilet room (right). We have used a couple of over-the-door hanging hooks for towels, sweaters and other clothes.

Here are 2 shots up in the master. Top shows the queen bed with nightstand storage (left) and hanging wardrobe (right). Ed replaced the fake drawer front with a reach-in wire basket. For my bedside storage of lotion, clock, chapstick et al., I added a hanging basket using "command" hangers which can be removed without damage if needed.
The shot below shows the armoire. I guess some people put a tv on top of the armoire (the plugs for it are right above) but we wanted more storage instead, so we found the perfect little 6-cubby storage thingy and it fit perfectly on top. You might also notice that we used stretchy cord to lasso the kleenex box to it's side (below the blue fan). And finally, underneath the doors, in the open space below, is where the hamper lives. I just pull it out and head to the laundromat. More "command" hooks for belts, etc.

Another thing I consider a "major" upgrade that the manufacturer should have thought of is the use of springs to hold up the cabinet fronts for the high overhead cabinets. As it was, you had to hold the lid up while digging around for the item stored there. Ridiculous, especially for a short person, and so easy to resolve. We added 5 springs and fixed them all at one time.

I'll include one shot of the shower just to show how -BIG- it is. We added a shampoo & shower gel dispenser which isn't seen in this shot.

I LOVE it!!
ReplyDeleteWhere's the guest room?
Just love your decor! Where did you get that awesome picture of the bear? It'd be cool if there was a wolf on the other side!
ReplyDelete